The Secret to a Full Wedding Gallery: The Three Second Rule
Your wedding day is a whirlwind of fleeting moments. While your professional photographer captures the big milestones, your guests are busy snapping hundreds of candid, hilarious, and heart-warming photos on their own phones. The challenge for every host is getting those photos from fifty different camera rolls into one private gallery without the hassle of social media tags or clunky app downloads.
This is where your event signage becomes your most important tool. At GUESTPIX, we have seen over 200,000 events, and the data is clear: photos only flow into your gallery if guests see the code and understand exactly what to do within three seconds. If a guest has to squint, search for the code, or wonder what it is for, they will simply put their phone back in their pocket.
QR code event signage is the physical bridge between a guest camera and your digital memories. By following a strategic approach to design and placement, you can ensure your gallery is overflowing with memories by the time you wake up the next morning.
Strategic Signage Placement: Where Guests Linger
Placement is everything. You cannot simply print one sign, hide it behind a floral arrangement, and expect a full gallery. To maximise participation, you need to place your QR codes in high-traffic areas where guests have a moment to breathe and their phones are already in their hands.
1. The Welcome Entry Table
The first impression is the best time to set the expectation for the day. Place a medium-sized sign (such as an A4 or 8×10 inch board) on the welcome table next to the seating chart or program. As guests arrive and wait for others to enter, they often check their phones or take a quick selfie to document their arrival. Seeing the QR code early lets them know that photo sharing is encouraged throughout the entire event.
2. The Bar and Cocktail Stations
The bar is a goldmine for guest engagement. Whether it is during the cocktail hour or the reception, guests spend a significant amount of time waiting for drinks. This is high dwell time. A small, elegant sign placed right at the ordering point is impossible to miss. While they wait for their signature cocktail, they can scan the code and see that your gallery is ready and waiting for their uploads.
3. Dining Tables (The Power of Table Tents)
The dining table is where the most meaningful interaction happens. Guests are sitting with friends, sharing stories, and taking photos of their meals and each other. We recommend using 4×6 or 5×7 inch table cards or tents. You should aim for at least two signs per long banquet table or one sign per round table of eight. This ensures the code is always within reach and serves as a constant, gentle reminder to capture the celebration.
4. The Guestbook and Dessert Stations
As the night progresses, guests naturally gravitate toward the guestbook or the dessert table. Placing a sign here is particularly effective if you are using the GUESTPIX written guestbook feature (included in our free tier) or the video guestbook (available in our paid tiers). It reminds guests that they can leave a heartfelt message or a funny video alongside their photos.
Technical Design: Lighting, Glare, and Materials
A beautiful sign is useless if it does not scan. The technical side of QR code design is often overlooked, but it is the difference between a successful gallery and a frustrating experience for your guests. You must account for the environment of your venue, especially if your reception is indoors or held after sunset.
Matte Cardstock vs. Glossy Acrylic
Acrylic signs are a popular trend in wedding decor, but they carry a hidden risk: glare. Most wedding venues use spotlights or fairy lights that create harsh reflections on shiny surfaces. If a light reflects directly off the QR code, the phone camera will not be able to read the data. If you love the look of acrylic, choose a frosted or matte finish. However, for the most reliable results, we always recommend high-quality matte cardstock. It absorbs light rather than reflecting it, ensuring a perfect scan every time.
The High Contrast Rule
Never invert your QR code colours. While it might look modern to have a white code on a navy or black background, many older smartphones struggle to read inverted codes. Stick to the gold standard: a dark code on a light or white background. This provides the highest contrast, which is essential for scanning in low-light environments like a candle-lit reception.
Minimum Sizing Requirements
Size matters when it comes to scan distance. For table cards where a guest is sitting only a few feet away, the QR code itself should be at least 2×2 inches (5×5 cm). For larger welcome boards or entrance signs where guests might be scanning from five or ten feet away, you will need to scale the code significantly larger to ensure the camera can lock onto the pattern.
Ready to capture every guest photo?
Start with a free gallery and collect up to 50 photos today.
Creative Wording Formulas That Drive Scans
The wording on your sign should do more than just exist, it should invite your guests to participate. The tone of your signage should match the personality of your event. Here are four wording formulas that have proven to be highly effective for GUESTPIX hosts.
1. The Elegant and Romantic Approach
“Please help us capture the love. Scan to share your photos and videos into our private gallery. Your perspective means the world to us.”
2. The Fun and Casual Approach
“Be our unofficial photographer! We want to see the night through your eyes. Scan this code to upload your candid snaps, no app required.”
3. The Minimalist Approach
“Scan to share the memories.” (Pairs perfectly with a large, clean QR code and simple typography).
4. The Direct and Action-Oriented Approach
“Upload your photos here. Open your camera, scan the code, and select your best shots. It is that simple.”
Regardless of the tone you choose, you must always include a tiny “how-to” note for less tech-savvy guests. A simple line like “No app needed – just open your camera, scan, and upload” removes the primary barrier to entry. If you are using one of our paid tiers, don’t forget to mention that guests can also upload video clips and leave video messages to help you relive the day in motion.
DIY Design with Canva and the GUESTPIX Suite
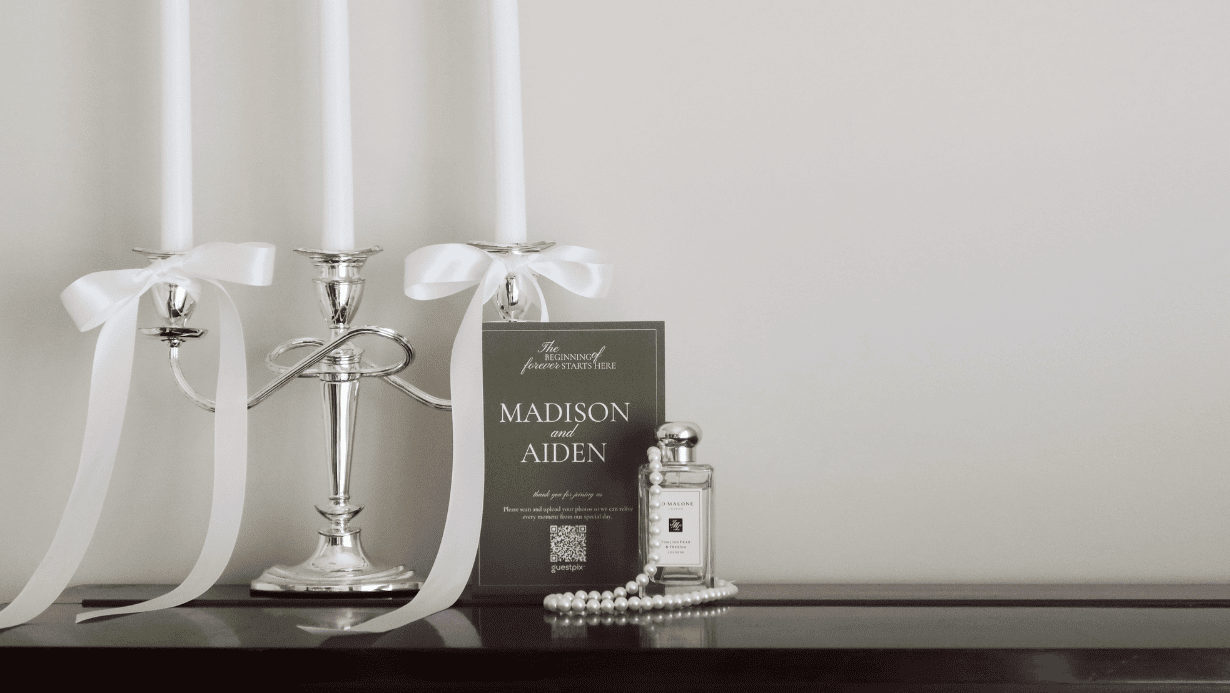
You do not need to be a graphic designer to create stunning signage. Every GUESTPIX gallery comes with access to our design suite, including pre-made Canva templates that you can customise in minutes. This ensures that your QR code signage looks like a deliberate part of your stationery suite rather than an afterthought.
When customising your templates, keep your typography clean. While script fonts are beautiful for your names, the instructions and the “No app needed” text should be in a highly legible sans-serif font. You can easily match the colour palette to your flowers or bridesmaids’ dresses, but remember to keep that QR code on a light background for functionality.
When you are ready to print, consider the weight of your paper. A flimsy piece of office paper will curl or blow away if your event is outdoors. Use at least 250gsm cardstock for a premium feel. If you are printing at home, ensure your ink levels are high so the QR code is crisp and sharp. For the best results, take your digital files to a local print shop or use an online service to get professional-grade matte prints.
Want unlimited photos and video uploads?
Upgrade to a paid package for full-resolution storage and video guestbook features.
Frequently Asked Questions
How to display a photo QR code at a wedding without ruining table decor?
What size should an event QR code sign be for reliable scanning?
Can I include a photo QR code on printed wedding invitations?
Why won’t my guests scan my event QR code?